
Already purchased your 2026/27 Mt. Abram Season Pass? We’re excited to get you set up in our new ticketing system!
As part of our transition to a new system, all passholders who purchased their passes before the changeover will need to complete a one-time process to claim their passes in our new online shop.
We know you’ve already paid for your passes, and you won’t be charged again! We’ve issued vouchers for your previously purchased passes that will cover the full cost at checkout.
Follow the steps below to get everything set up and ready for winter.
Step 1: Find Your Season Pass Voucher Email
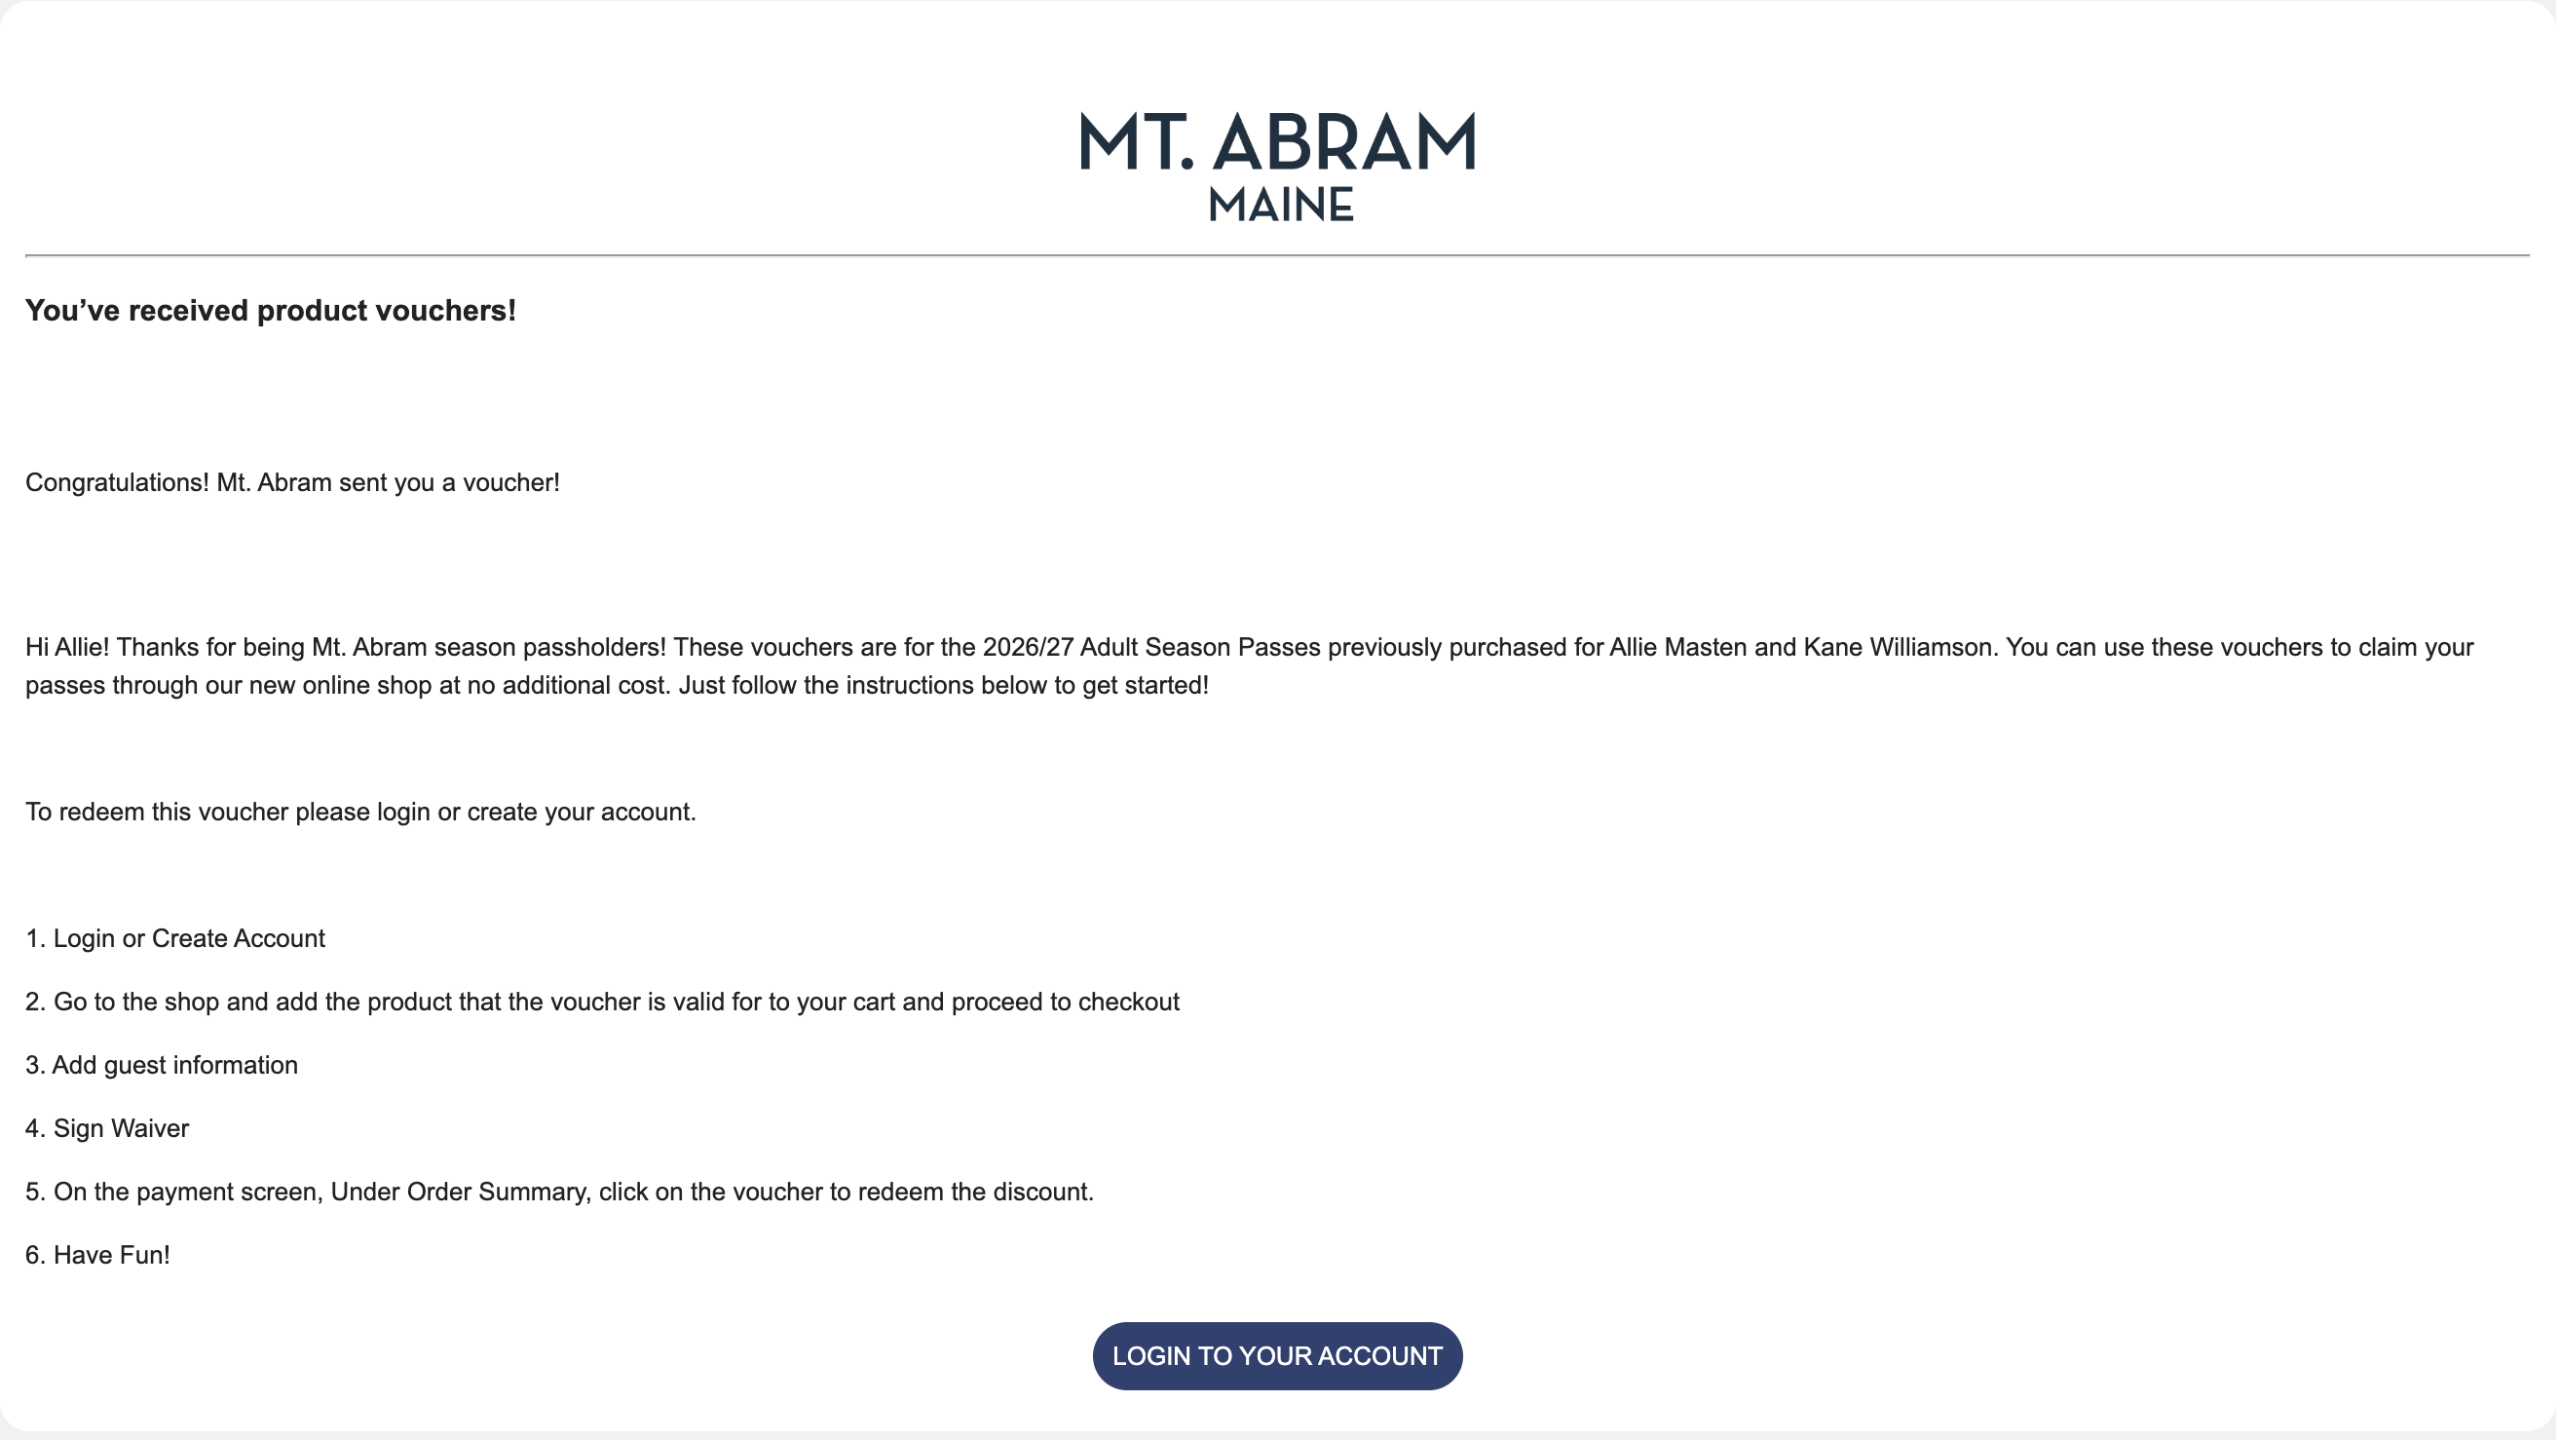
You’ll receive a separate email from Mt. Abram with your season pass vouchers. This email will be sent to the email address we have on file from your original purchase.
If you purchased multiple passes under the same email address, you may receive more than one voucher email.
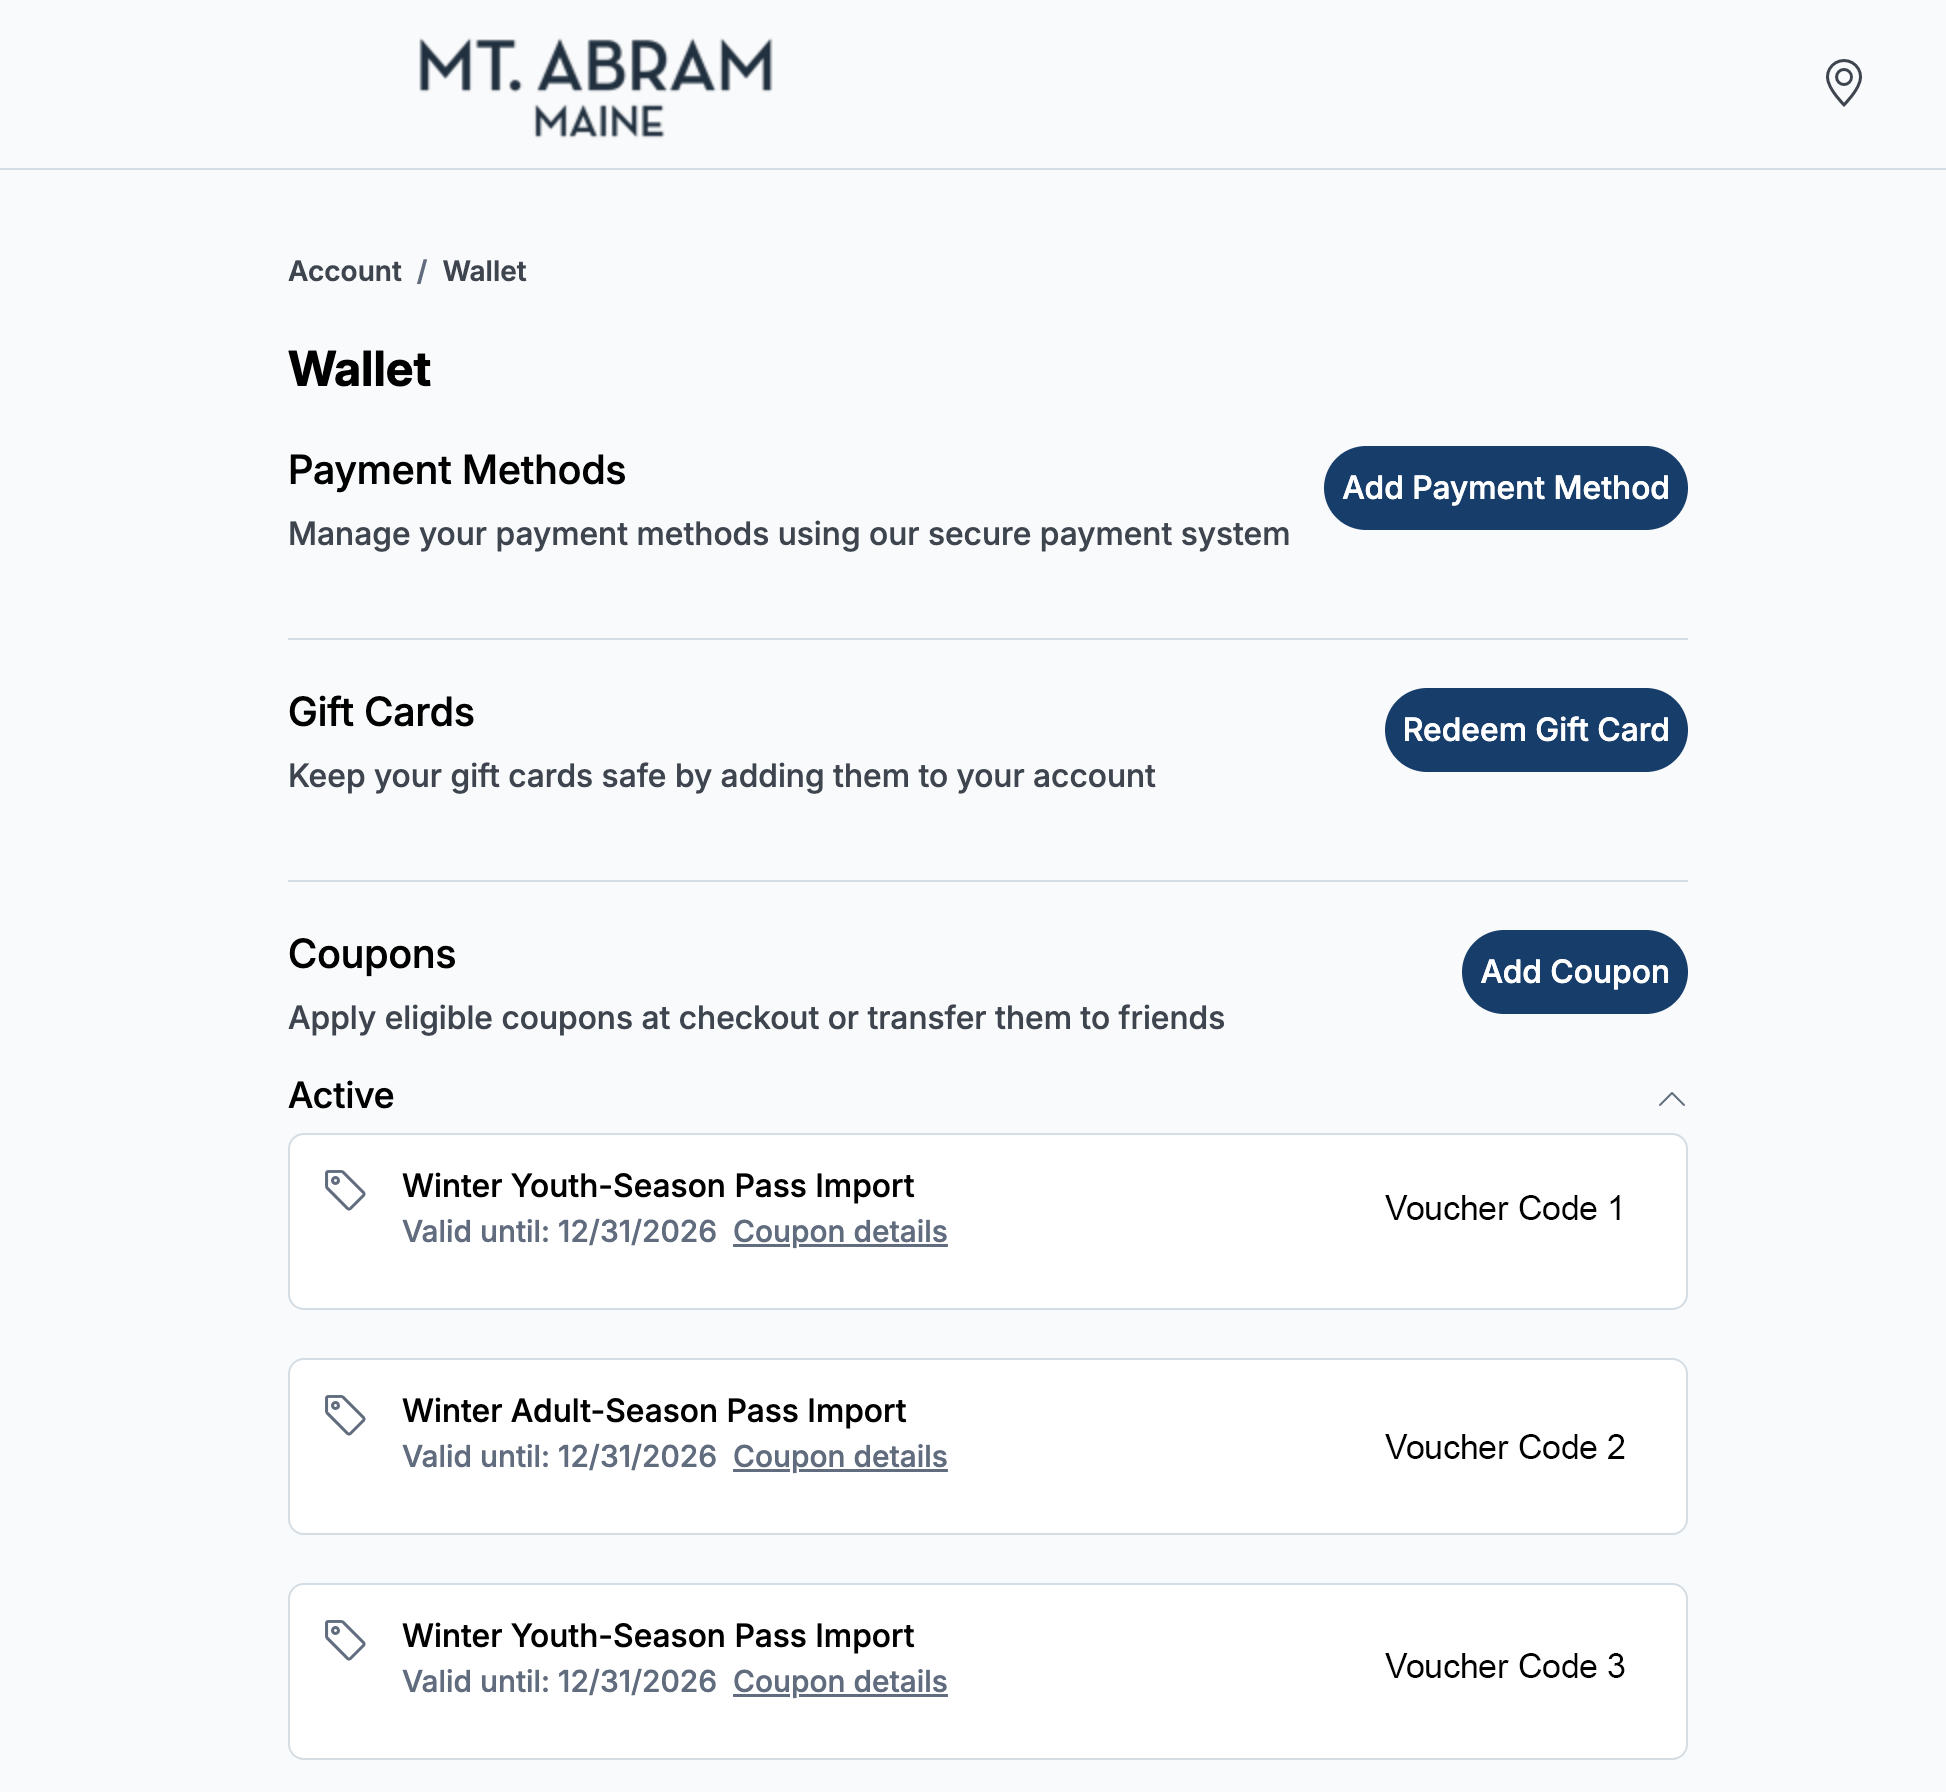
You do not need to enter or copy any voucher codes. Your vouchers are already linked to your email address and will be available in your new account.
Step 2: Create Your New Mt. Abram Account
In your voucher email, click the Login to Your Account button.
This will bring you to our new online shop, where you’ll be prompted to log in or create an account.
Since we’ve moved to an entirely new system, everyone will need to create a new account, even if you’ve had an account with Mt. Abram in the past.
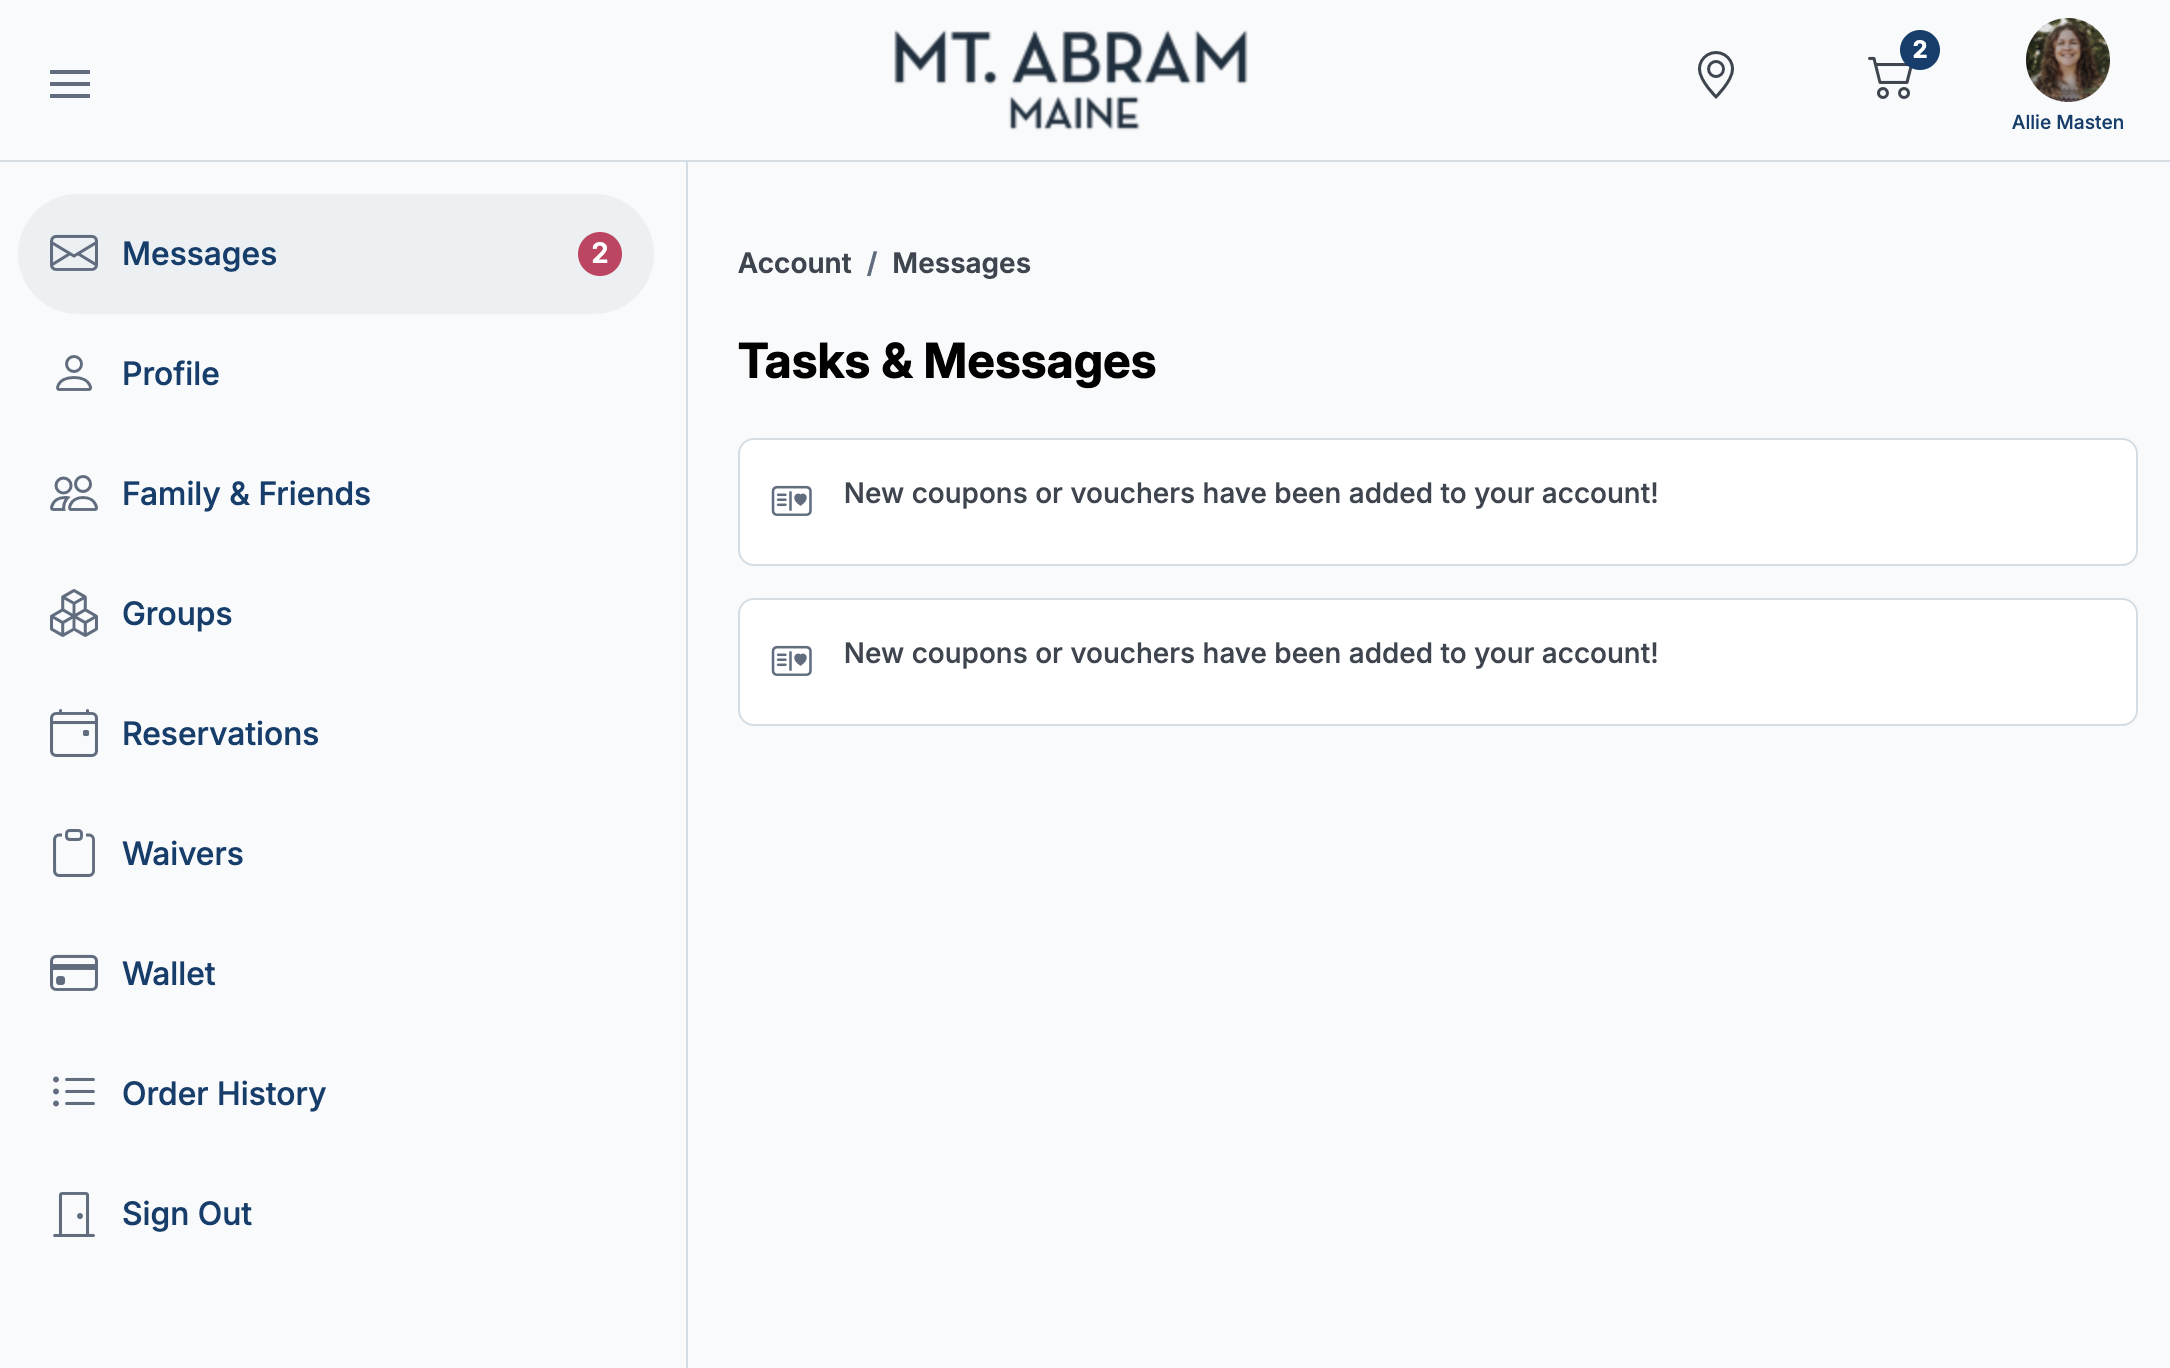
Once you have logged in, you will see a message that vouchers have been added to your account. These are visible under the “Wallet” section on your account.
Be sure to use the same email address where you received your vouchers so they will be available in your account.
Step 3: Add Your Season Passes to Your Cart
Once you’re logged in, head to the online shop and select the season pass products that match those you previously purchased.
Add the correct number of passes to your cart. For example, if you previously purchased two adult passes and two youth passes, you’ll add two of each to your cart.
You can claim multiple passes in the same transaction, so there’s no need to complete a separate checkout for each family member.
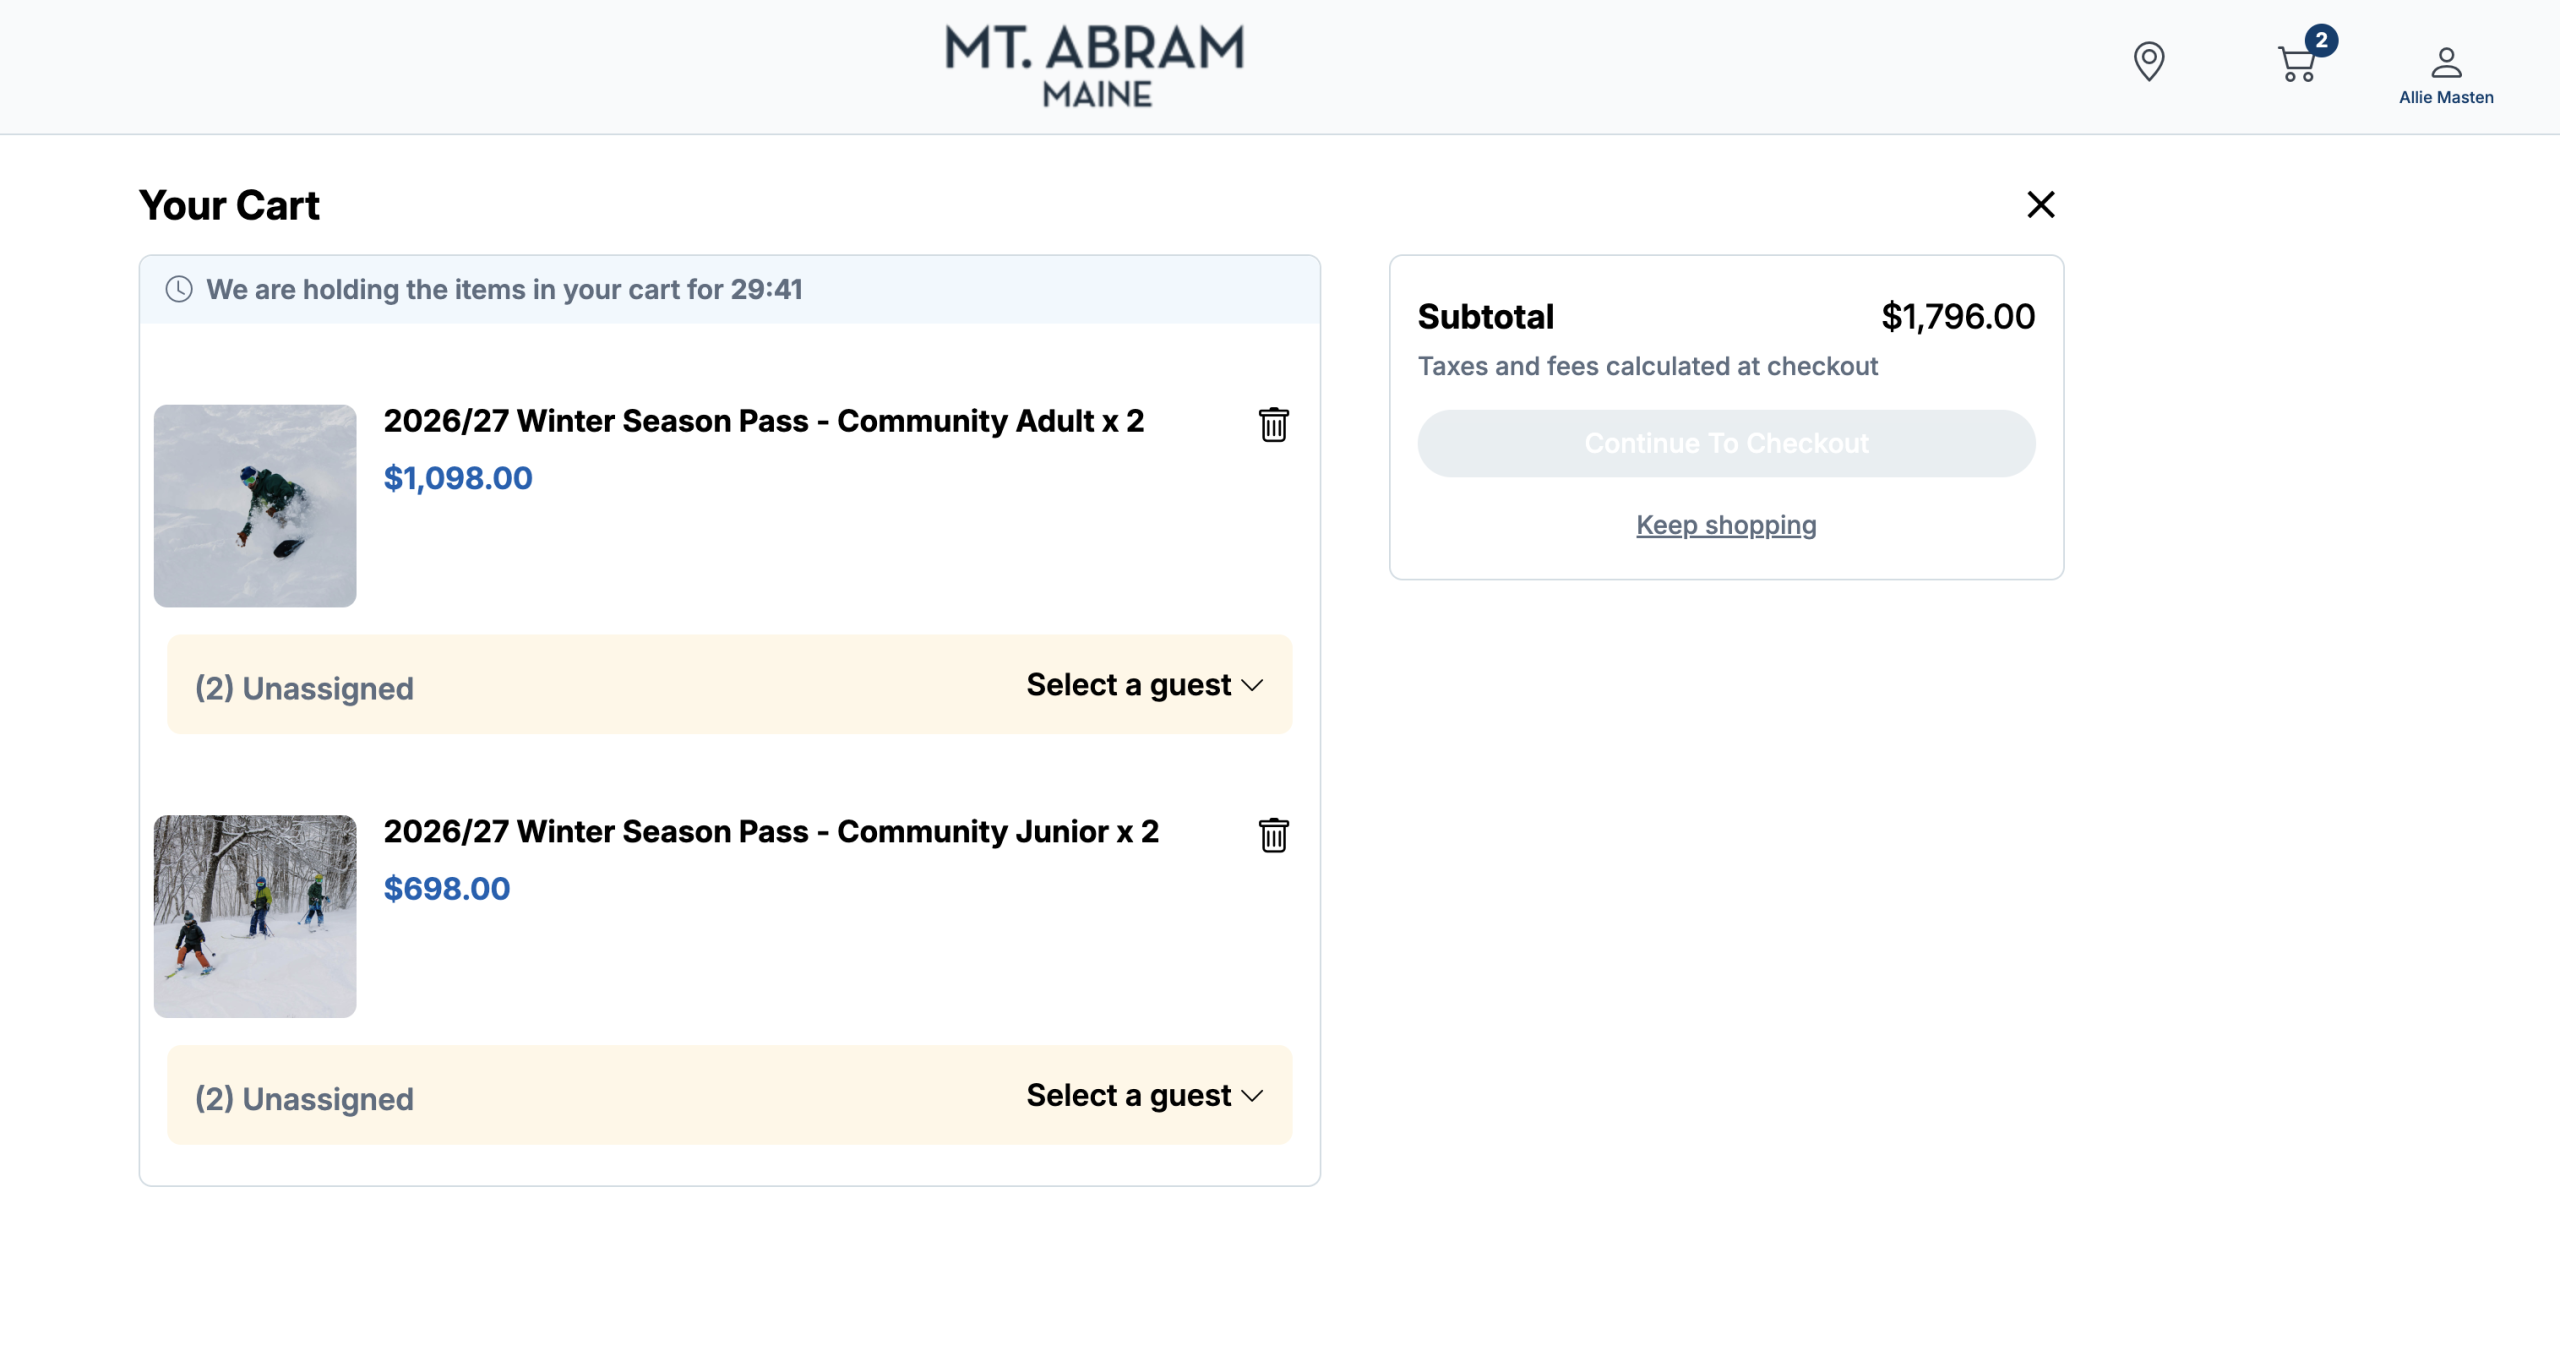
Don’t worry about the prices you see! Your cart will initially show the regular price of your passes. Your vouchers will bring that total down to $0 when you reach checkout.
Step 4: Assign Each Pass to a Guest
Before proceeding to checkout, you’ll need to assign each season pass to the person who will be using it.
Under each pass in your cart, click Select a Guest. If you’re assigning a pass to yourself, simply select your name. If you’re assigning a pass to someone else, click Add a New Guest and enter their information.
Helpful tip: You’ll want to have a photo of each passholder ready to upload, as photos are required during checkout.
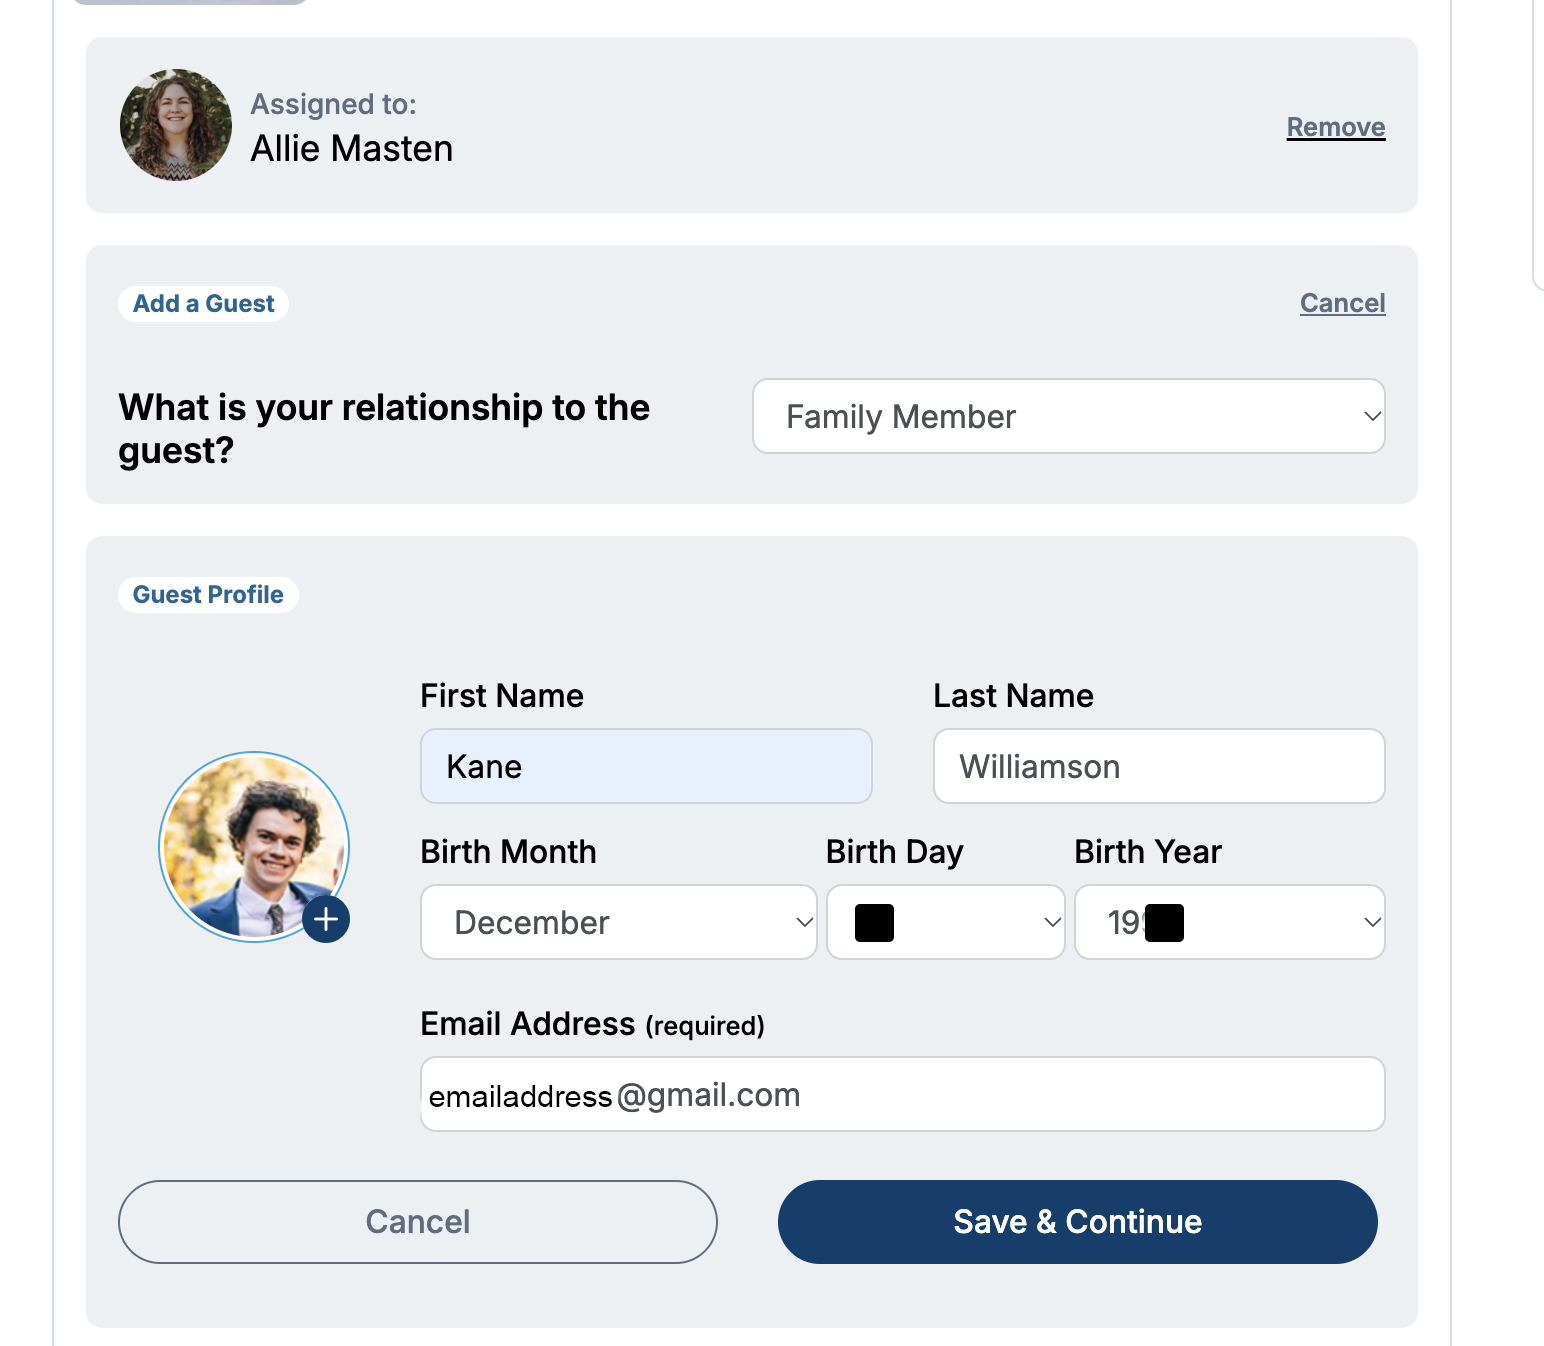
Adding Another Adult
When adding an adult passholder, you’ll be asked for their name, date of birth, and email address.
Each adult passholder must have their own unique email address. This is an important change from our previous system.
You can still purchase and claim passes for other adults in the same transaction, but each adult will have their own account associated with their email address. This allows them to manage their information, access their passes, and complete waivers.
Once you’ve entered their information, click Save & Continue.
Adding a Child
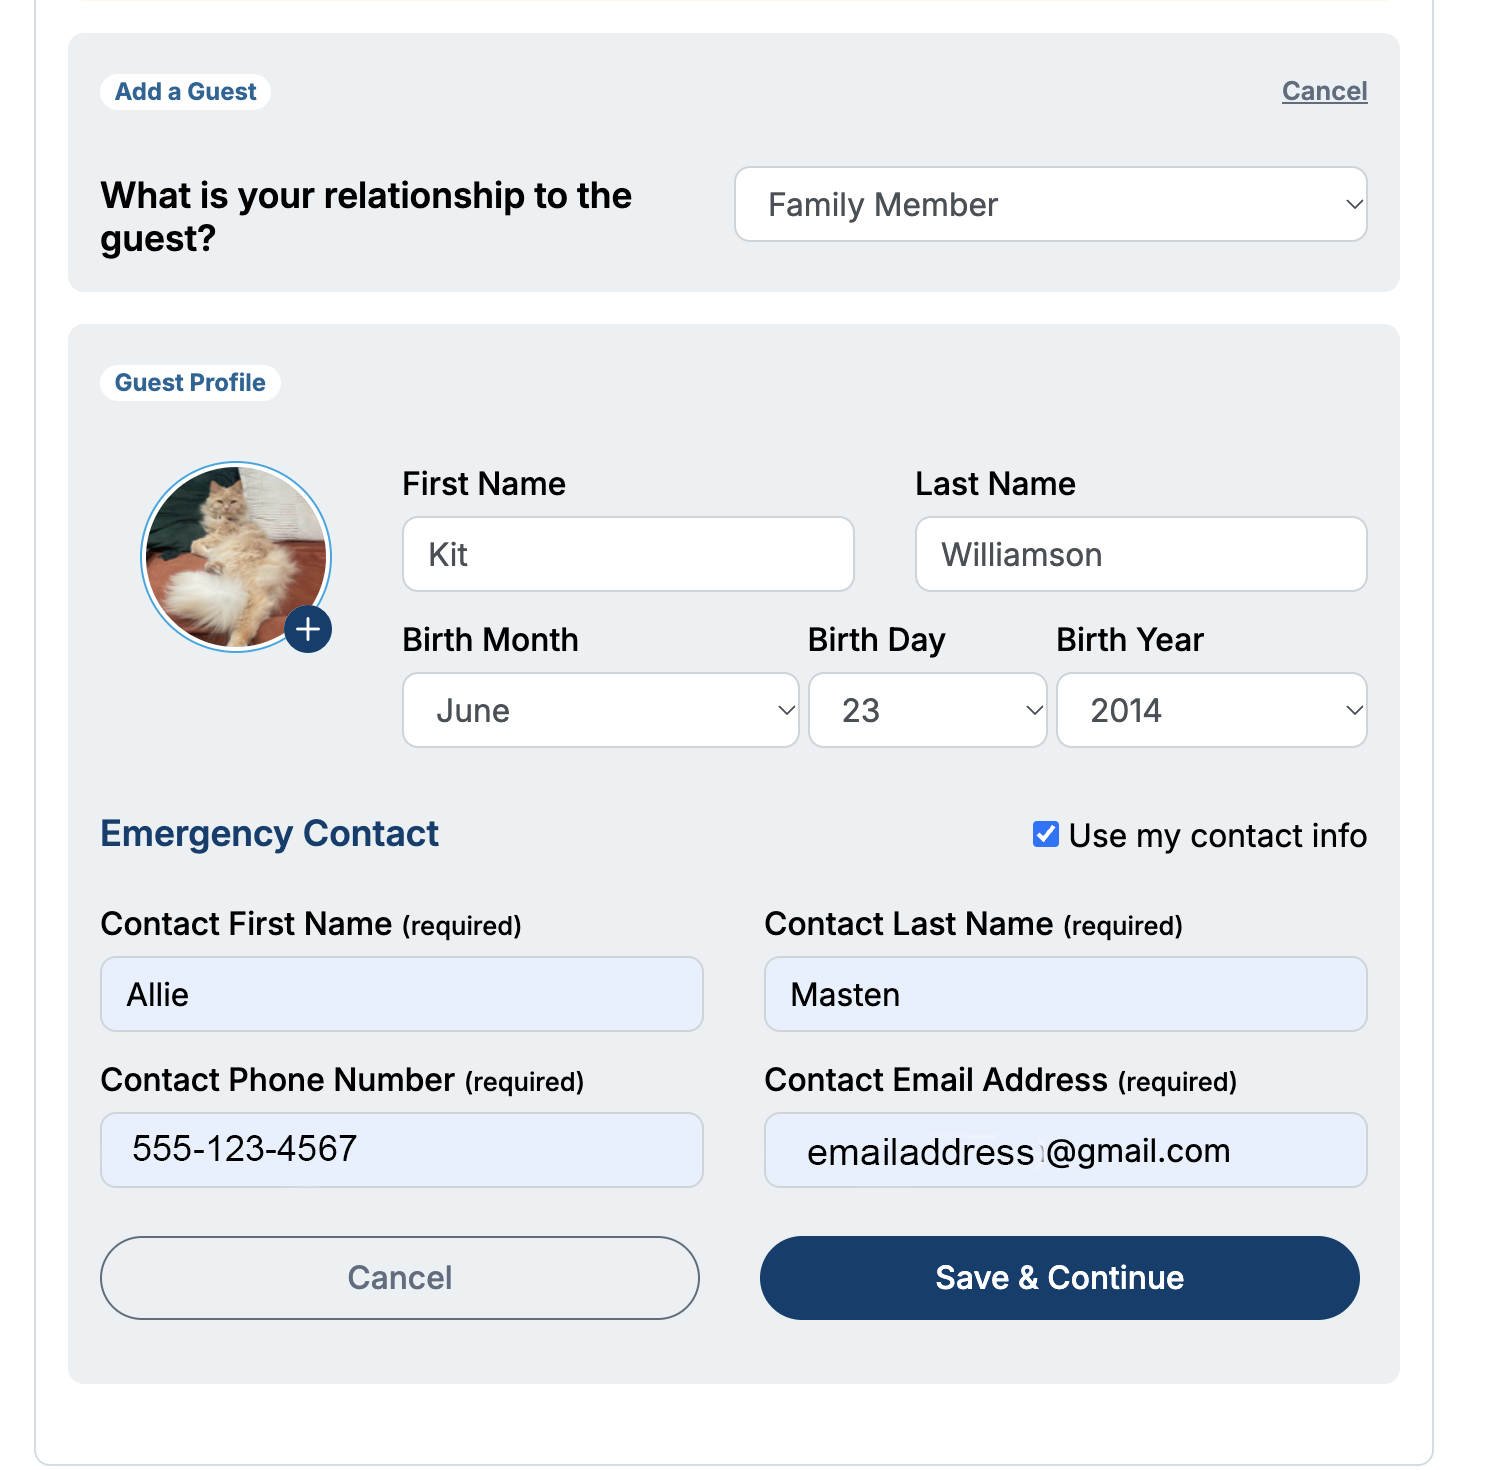
Children can be added directly to a parent or guardian’s account. They do not need their own email address or separate login.
When adding a child, you’ll be asked for their name, date of birth, and emergency contact information.
You can select Use My Contact Info to automatically fill in your own information as their emergency contact.
Click Save & Continue and repeat the process for any additional children.
Step 5: Complete Your Waivers
Once you’ve assigned your passes, you’ll be prompted to complete the required waivers.
Even if you previously signed a waiver when purchasing your season pass, you’ll need to complete a new one in our updated system.
Follow the on-screen instructions to complete the waivers before continuing to checkout.
Step 6: Apply Your Season Pass Vouchers
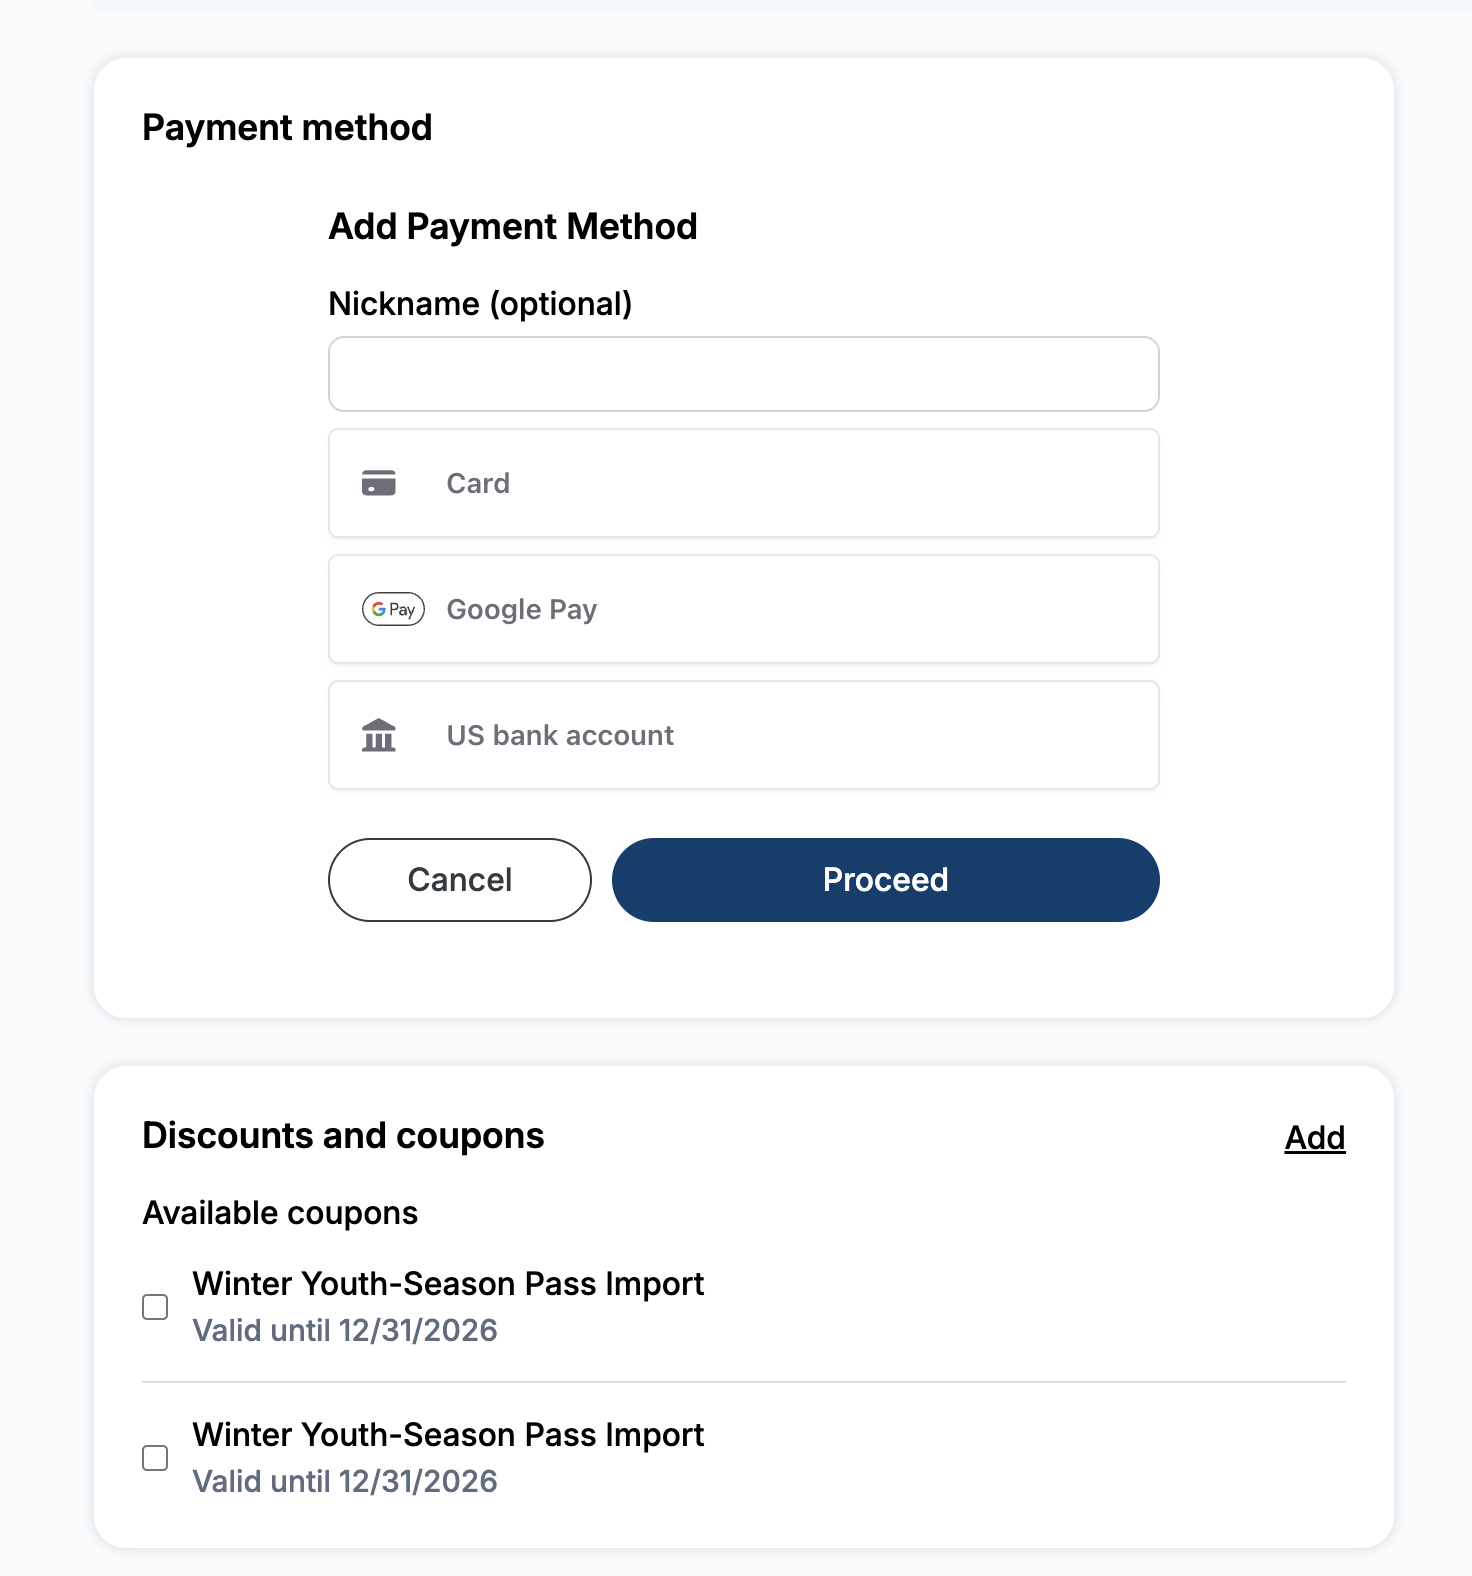
Once you’ve reached checkout, look for the Discounts and coupons section.
Your available season pass vouchers will automatically appear here. You do not need to enter any codes.
Your vouchers will already be available in your account, but you’ll still need to select them during checkout for the discounts to be applied.
Check the box next to each voucher to apply it to your purchase. If you’re claiming multiple passes, make sure you’ve selected all the applicable vouchers.
As you select your vouchers, you’ll see the discounts reflected in your Order Summary.
Step 7: Confirm Your Total and Complete Checkout
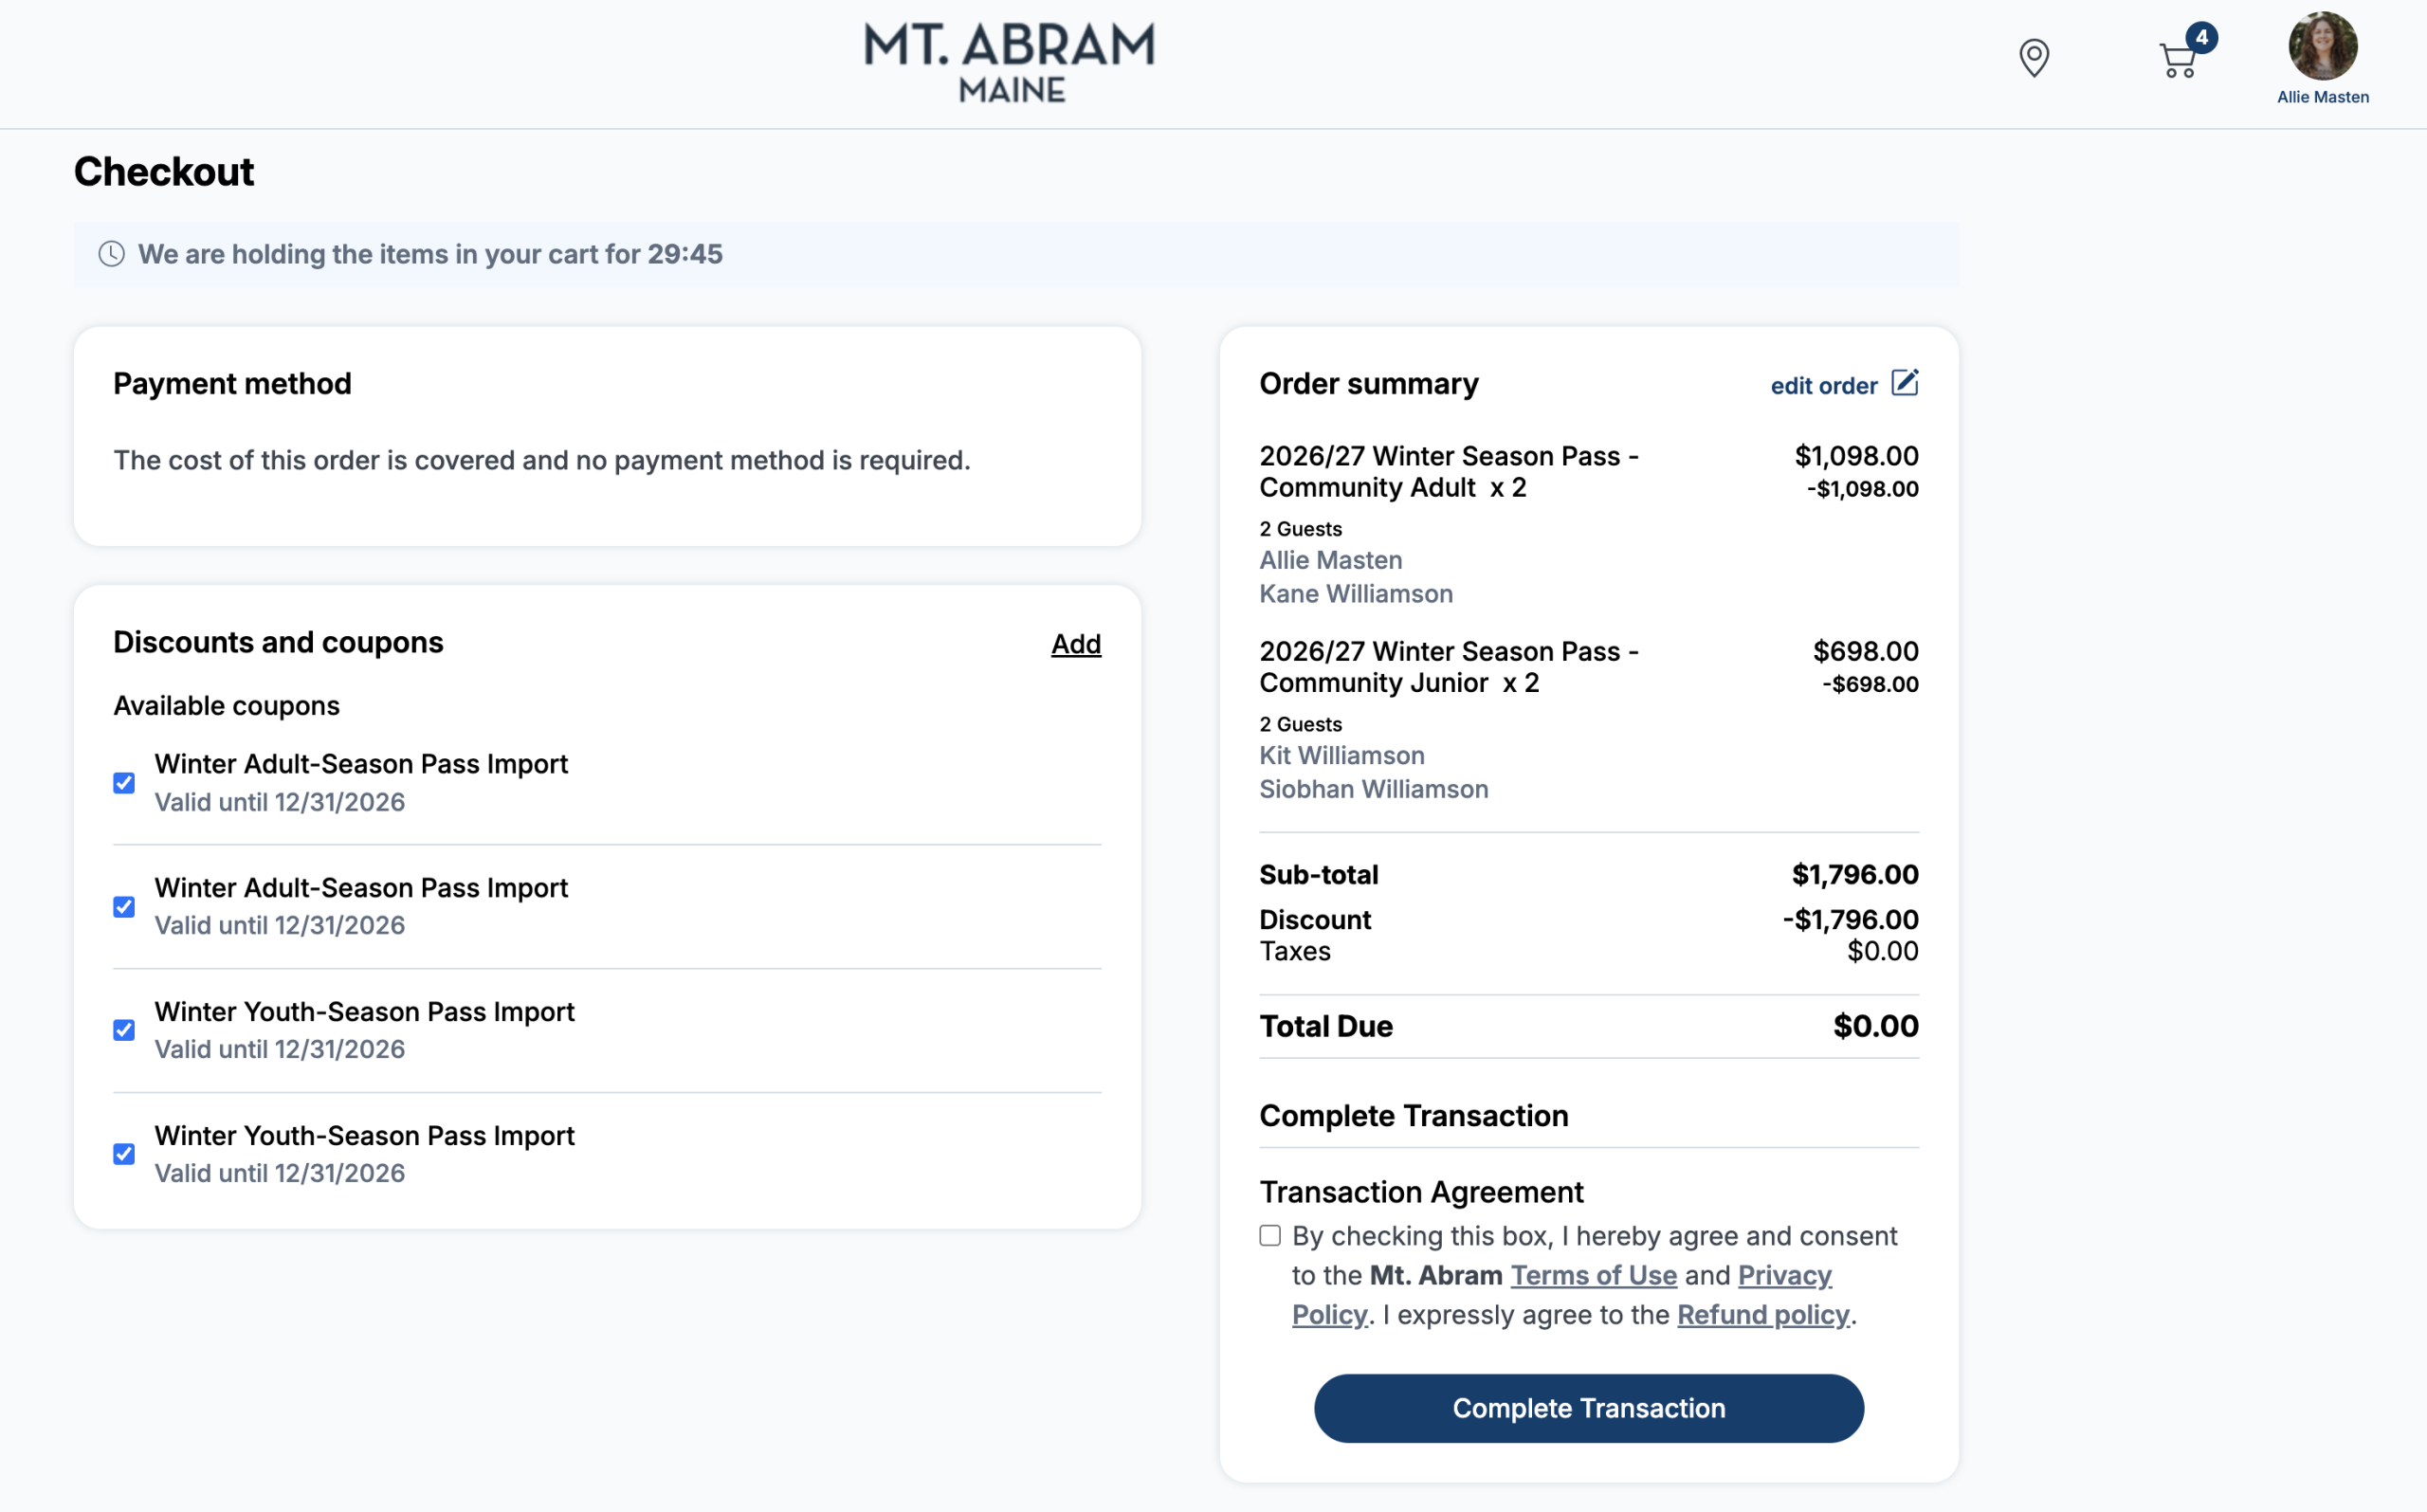
Before completing your transaction, take a moment to review your Order Summary.
Make sure:
- All of your season passes are listed.
- Each pass is assigned to the correct person.
- All applicable vouchers have been selected.
- Your Total Due is $0.00.
If your vouchers cover the full cost of your previously purchased passes, you will not need to enter a payment method.
Once everything looks correct, check the box to accept the transaction agreement and click Complete Transaction.
Need a Hand? We’re Here to Help!
We know switching to a new system can take a little getting used to, especially for our longtime passholders.
If you run into any trouble claiming your passes, or would simply prefer a little help getting everything set up, we’re happy to walk you through it. Please email guestservices@mtabram.com with any questions
We’ll also be available to help guests in person at our upcoming passholder events.
Thanks for taking a few minutes to complete this process and for being part of the Mt. Abram community. We can’t wait to see you back on the mountain this winter!